

All parents want to be able to give their daughter a "dream wedding". The only problem is -- money is usually a contributing factor as to whether or not that can be accomplished. My daughter had big dreams of a "shabby chic" wedding with a sit down dinner, dancing and around 150 guests. Wow.... if that doesn't break the bank --what will? BUT.. because we wanted to make her dreams come true and her dad and I knew that we could do a lot of the decorating ourselves... we set to work. We have a very talented family that also wanted to help do all they could. So, we knew we could be successful with all their help! And, it was a beautiful, magical wedding. I originally had planned to share all the things I learned about decorating as I went along -- but time got away from me. SO -- I would like to share some of the ways we learned to save money and lessons we learned along the way with you now. First things first -- START EARLY! Luckily, we had a little over a year to plan everything. Hilary started a secret pinterest page and pinned all the things she liked. No one could see the page except for me and her. She chose a "theme" and started pinning things she liked. I looked at it everyday and got an idea of what she wanted. Next -- I started right away. I bought up all the candlesticks I could find. I set a budget of not paying over $1.00 for a candlestick -- unless it was a candelabra. (then I just used my judgement about what I felt was a fair price). I knew that I had to spray paint all of them an off white color AND add crystals so I had to keep it cheap. I was able to purchase over 100 candlesticks of varied heights for $1.00 each or less. I searched yard sales, thrift stores, antique shops and even had friends and family donate some they no longer used or had found themselves. Next, I started collecting burlap. I lucked out at a yardsale in Huntsville, Alabama. (My sister lives there and takes me yard saleing every time we visit!) One particular yard sale had a couple living there that had just gotten married two months earlier and used the same shabby chic theme. She sold me all her burlap pieces, some white tablecloths, burlap bows and several other things for $20.00. It was a steal! I knew I would need ALOT of burlap because I had been eyeing a burlap and muslin tablecloth on etsy that I just loved. Here it is:

Isn't that just gorgeous? However, it was over $300.00. (a very fair price for all the work that went into it!) But -- I knew that was a budget breaker. So , I gathered some of the burlap that I found at my yardsale and set to work making my own. My daughter's soon to be mother in law had given me some muslin she used for a wedding shower and it was just enough for what I needed! Two weeks and a lot of tears and hair pulling later..... Here it is:

It was VERY time consuming but well worth the savings!
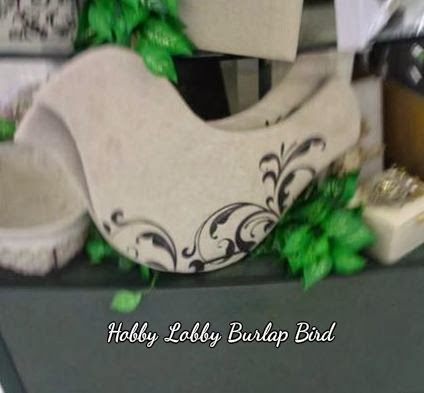
Here is another burlap idea I had. I saw this bird at Hobby Lobby. It's so adorable! It was not all that expensive -- but I knew that I could get it done cheaper. I had extra wood at home and my brother in law is very skilled at cutting wood.. so I used more of the yard sale burlap. a stencil I already had, a staple gun, and just made my own. (Mine is a lot bigger too)
My bird....

And here is another burlap project. I loved this burlap and muslin rose wreath pictured below. It matched Hilary's theme so well. But priced at $49.99 -- even the 40% off coupon wouldn't make it very affordable! So -- I used a foam wreath I already had at home and more of that burlap and muslin to make my own. MUCH CHEAPER and I made it larger and dressed it up with pearl centers and a bow.


Hilary had posted several burlap and lace wedding guest books on her pinterest page that she liked. Here is one of them.

While thrift store shopping one day, I found this brand new guest book pictured below for $1.00. I thought.. hmmm.. it has "good bones". So I took it home and re-decorated it to match our theme.


Hilary really liked it!
I hope some of these ideas have been helpful. I know that I have already shared some of these projects earlier on my blog. However, I wanted to put them all together so maybe it will be helpful to someone planning a wedding. I have SO many more things to share with you, but I am going to try and keep this to a "three part series." I want to tell you all about our diy dessert bar and the serving pieces we used. Keep an eye out for another post soon. Thanks for dropping by. See you again soon!

No comments:
Post a Comment