Thursday, October 23, 2014

"How to have that dream wedding at less than nightmare cost" (Part 2)

Hello friends!  I hope you enjoyed my first post on "How to have that dream wedding at less than nightmare cost". This is the 2nd post in my series and I want to share a few other things I learned.  (If you missed the first one, you can find it here:  http://www.crosson5.blogspot.com/2014/10/how-to-have-that-dream-wedding-at-less.html)  Now... down to business....This is very important and saved us tons of money.....so read this carefully.......Use all the talent your family and friends have and are willing to offer!  Most family and friends would love to help out in any way possible.  A wedding is a family affair so don't be afraid to ask those family members for their help. Here are some of the many ways our family members helped: 

Hilary's aunt is a budding photographer with a lot of talent.  This was the first wedding she had ever done and she handled it like a pro.  We are fortunate to have such a talented family and she really put a lot of time and effort into this.   Wish I could share them all but --- Just check out some of these gorgeous pictures she took:


Beautiful, fun and creative pictures with a  great "family discount!"  Here's another talented family member -- Hilary has an Uncle who is a hairdresser and fixed her hair, my hair, the mother of the groom, the flower girl and ALL the bridesmaid's hair.  (He did a BEAUTIFUL job!  It was ALOT of work too.)  He was so sweet to do this as a gift to Hilary and John.
 
 
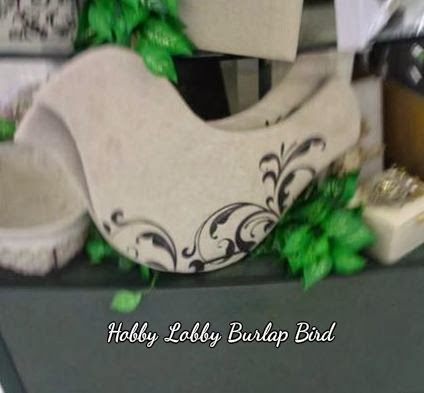
  She has another uncle who does wood work and was so sweet to cut out some of the props we used.
 
 
Hilary's soon to be mother-in-law bakes cakes.  She made the bride's cake and it was beautiful AND delicious.


She also has an aunt who bakes cake.  She made the groom's cake and it was a hit! (Who doesn't love anything with Uncle Si on it?)
 
 
I also accepted help from any of my friends who offered.  I borrowed props from a friend of mine who runs a thrift store.  I had purchased LOTS of things for the wedding from him (candle sticks, serving pieces and such) so he was more than happy to let me borrow some props for the photo booth. (fur coats, hats, etc.)  I borrowed the mink coats and purchased the dancing shoes in bulk for less than .50 cents per pair.  The shoes were a hit and actually very comfortable for dancing. 


Another savings -- Hilary's grandmother works for a company that prints wedding invitations.  She let Hilary and John pick out their invitations and napkins and gave them to them as part of their wedding present.  Also -- both Hilary's grandparents wanted to help financially in some way and they helped to secure the deposit for the reception venue.

Hilary's father built the back drop and the photo booth for us.  He also helped with SO many projects that I can't remember them all.  Here is the backdrop with an explanation of where I found some of the materials.

 
The three chandeliers up top were bought from a bridal shop that was going out of business.  I bought all three for $75.00.  Hilary and John plan to use them in their new home.    I put battery operated candles in them and hid the electric wires to keep from having to worry about running electricity.    I purchased the mantel from a friend who has an antique booth.  The framed  "R"  was a thrift store frame that I covered in burlap and Tracy cut the "R" for me.  The coffee bar was a shaker's table from my kitchen and the cake table was a small antique table from my living room.  I already had the white curtains and the topper lace piece was a king size dust ruffle I purchased from a thrift store for $3.00 and then cut the center out.  I sewed all the table cloths and curtains  from burlap that I purchased at Hobby Lobby using my 40 % off coupon.  (I purchased 2 bolts.)


This is the photo booth that Tracy built.  The photographer on the left is Hilary's cousin.  He enjoyed taking the pictures and he wrote down everyone's email address and gave to me.  I emailed everyone their pictures after the wedding.  This was a lot of fun. 

Sorry this post is so long... I just keep thinking of things I want to share with you.  I had intended to share about the dessert bar and the great groom's table find.... I guess I will have to hold that off till Part 3.  I am so excited to share it with you.  Thanks for visiting.  I hope you are finding some of this helpful.

Monday, October 13, 2014

How to have a "Dream Wedding" at a" less than nightmare cost "(Part 1)


All parents want to be able to give their daughter a "dream wedding".  The only problem is -- money is usually a contributing factor as to whether or not that can be accomplished.  My daughter had big dreams of a "shabby chic" wedding with a sit down dinner, dancing and around 150 guests.  Wow.... if that doesn't break the bank --what will?  BUT.. because we wanted to make her dreams  come true and her dad and I knew that we could do a lot of the decorating ourselves... we set to work.  We have a very talented family that also wanted to help do all they could.  So, we knew we could be successful with all their help!  And,  it was a beautiful, magical wedding.  I originally had planned to share all the things I learned about decorating as I went along -- but time got away from me.  SO --  I would like to share some of the ways we learned to save money and lessons we learned along the way with you now.  First things first  -- START EARLY!  Luckily, we had a little over a year to plan everything.  Hilary started a secret pinterest page and pinned all the things she liked.  No one could see the page except for me and her.  She chose a "theme" and started pinning things she liked.  I looked at it everyday and got an idea of what she wanted.  Next -- I started right away.  I bought up all the candlesticks I could find.  I set a budget of not paying over $1.00 for a candlestick -- unless it was a candelabra.  (then I just used my judgement about what I felt was a fair price).  I knew that I had to spray paint all of them an off white color AND add crystals so I had to keep it cheap.  I was able to purchase over 100 candlesticks of varied heights for  $1.00 each or less.  I searched yard sales, thrift stores, antique shops and even had friends and family donate some they no longer used or had found themselves.  Next, I started collecting burlap.  I lucked out at a yardsale in Huntsville, Alabama. (My sister lives there and takes me yard saleing every time we visit!)   One particular yard sale had a couple living there that had  just  gotten married two months earlier and used the same shabby chic theme.  She sold me all her burlap pieces, some white tablecloths,  burlap bows and several other things for $20.00.  It was a steal!  I knew I would need ALOT of burlap because I had been eyeing  a burlap and muslin tablecloth on etsy that I just loved.  Here it is:
 
Isn't that just gorgeous?  However, it was over $300.00. (a very fair price for all the work that went into it!) But -- I knew that was a budget breaker.  So , I gathered  some of the burlap that I found at my yardsale and set to work making my own.  My daughter's soon to be mother in law had given me some muslin she used for a  wedding shower and it was just enough for what I needed!  Two weeks  and a lot of tears and hair pulling  later.....  Here it is:
 
It was VERY time consuming but well worth the savings!
 
Here is another burlap idea I had.  I saw this bird at Hobby Lobby.  It's so adorable!  It was not all that expensive -- but I knew that I could get it done cheaper.  I had extra wood at home and my brother in law is very skilled at cutting wood.. so I used more of the yard sale burlap. a stencil I already had, a staple gun, and just made my own.  (Mine is a lot bigger too)
 
 
My bird.... 
 
And here is another burlap project.  I loved this burlap and muslin rose wreath pictured below.  It matched Hilary's theme so well.  But priced at $49.99 -- even the 40% off coupon wouldn't make it very affordable!  So -- I used a foam wreath I already had at home and more of that burlap and muslin to make my own.  MUCH CHEAPER and I made it larger and dressed it up with pearl centers and a bow.
 
 My wreath...........


Hilary had posted several burlap and lace wedding guest books on her pinterest page that she liked.  Here is one of them.

While thrift store shopping one day, I found this brand new guest book pictured below for $1.00.  I thought.. hmmm.. it has "good bones".  So I took it home and re-decorated it to match our theme.


Hilary really liked it!
 
I hope some of these ideas have been helpful.  I know that I  have already shared some of these projects earlier on my blog.  However, I wanted to put them all together so maybe it will be helpful to someone planning a wedding.  I have SO many more things to share with you, but I am going to try and keep this to a "three part series." I want to tell you all about our diy dessert bar and the serving pieces we used.   Keep an eye out for another post soon.   Thanks for dropping by.  See you again soon!
 

Tuesday, October 7, 2014

Bookshelf re-decorating

Disorganization has been driving me nuts lately!  My house almost looks like a hoarder's home. But never fear --  I have started the cleaning out process.  I emptied up my shelves in the living room and donated  8 boxes to the thrift store!  However, afterward  I found myself buying nick-nacks to place on my shelves because they looked too empty.  Lol.  Will this insanity ever stop?  Seriously, I found some really cute deals at our local thrift store to help add more style to my shelves.  Check out that adorable gold quail in the middle section in front of my three girls pictures.  It was $1.00 at the Miserly Mutt!  Lots of the milk glass I have were thrift store and yard sale finds.  Have I mentioned how much I love milk glass?  I spent a lot of time online learning how to "place" everything and how to "layer/build up" my nick-nacks.  I think it looks much better -- but I am sure it could still use some help.   Anyhow, this is just the beginning of my organization.  I am SERIOUSLY cleaning out my house.  I mean, how many of us actually  display, wear  or even use all the junk we have squirreled away?  Stay tuned for more.  This is only one side of my shelves.  I have the other completed but have not taken pictures yet.  By the way -- please excuse the poor quality of my pictures.  Now you know what I want for Christmas this year!  A decent camera! 


Thanks for dropping by!
 

Monday, October 6, 2014

White Pumpkin Topiary DIY


Hello friends!  Isn't this fall weather just wonderful?  I am enjoying the fall decorations and crisp, cool air.  I just love the white pumpkins that are  in style this year!  However, I found out that everybody does not feel that way.  When I showed my white pumpkin topiary to my daughter, she said, "When are you going to paint the pumpkins orange?"  Lol.  So, I added a little orange highlighting to keep everyone happy.  Below I have included the supply list and directions for the pumpkin topiary I made.  Hope you enjoy it and make one of your own!


First, spray paint your pumpkins white.  It will take several coats.  Then, remove the top stems from your three pumpkins BUT save one.  (they should pull off easily).  Place two foam disks in the bottom of your topiary container of choice.  I found my buckets at Hobby Lobby.  (I hot glued the disk to the bottom and then stuffed newspaper on the sides to hold it sturdier.)  Put moss on top of the foam.  Stick the dowel rod in the center of the foam in the pot.  Then, spear the bottom of the first pumpkin and go through the top.  Pull it down to the moss and sit it on top of the moss.  Next, hot glue moss/leaves on top of the first pumpkin and then spear second pumpkin on top of that. Apply moss/leaves again on top and then spear last pumpkin on that.  Now you will have some of the dowel rod sticking out of the first pumpkin.  Take the pumpkin stem you removed and  measure how much you need to leave of the dowel rod sticking out of top just enough to spear the stem on.  Cut the dowel rod to that length and then apply the pumpkin stem onto the dowel.  Hot glue the stem, moss, and leaves to the top.  Last, brush on a little burnt orange paint in random places on the pumpkins in a vertical motion.   I also painted my stem a brown color.  Embellish to your liking and you are done!  Now you have an easy, stylish, and affordable pumpkin topiary! (or make two!)  Happy Fall Ya'll!